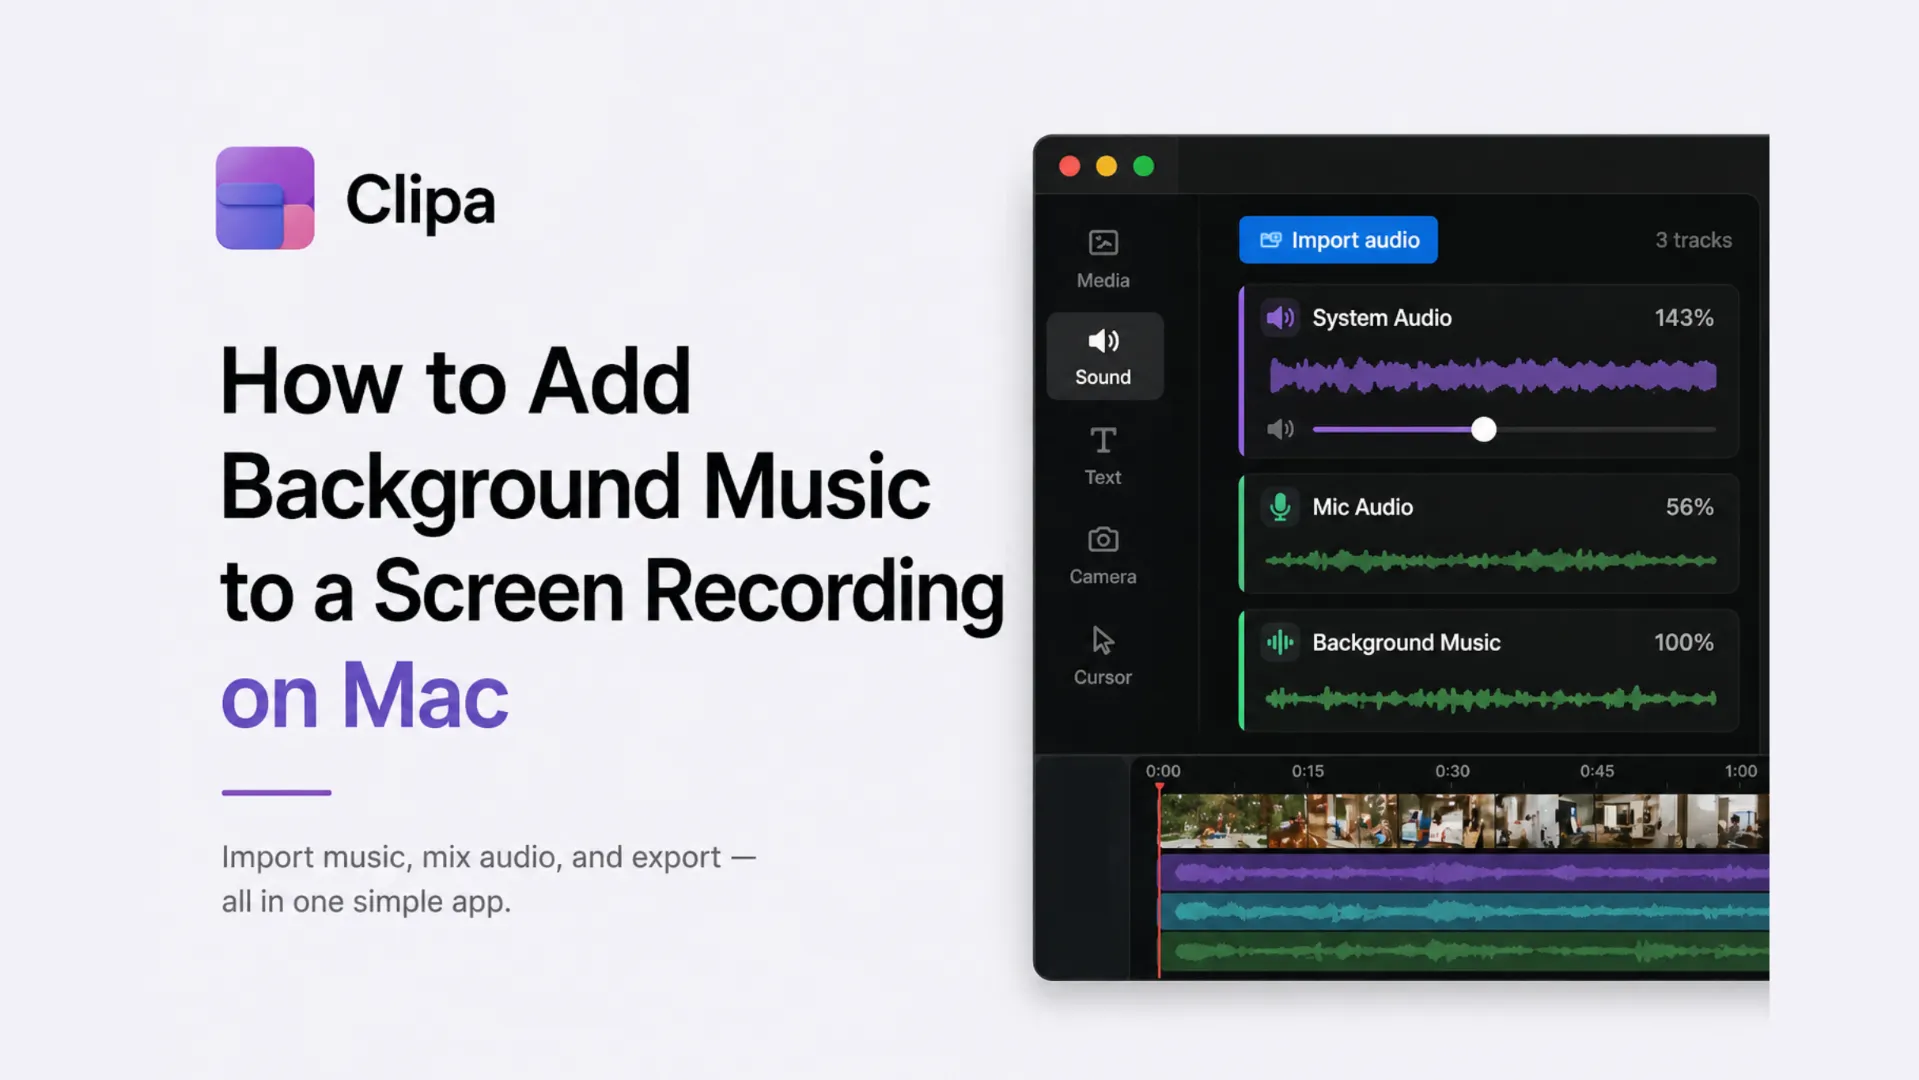
How to Add Background Music to a Screen Recording on Mac
Adding background music to a screen recording on Mac used to mean juggling three or four separate apps: QuickTime to capture, a virtual audio driver to route sound, and iMovie or Final Cut to lay in the music track. That multi-app friction costs an extra 30–60 minutes per video.
This guide shows the direct path — using Clipa, a native Mac screen recording and editing app — to import external audio, position it on the timeline, mix levels, and export a finished video without switching windows.
Why Background Music Elevates Screen Recordings
Silence draws attention to compression artifacts and keyboard noise. Research on multimedia learning consistently shows that non-intrusive background audio reduces perceived cognitive load and signals production effort, making viewers more likely to watch to completion.
For product demos, onboarding videos, and course content, a background track:
- Masks ambient room noise and mechanical keyboard clicks
- Creates tonal continuity across edited cuts
- Smooths out the auditory flatness of raw screen-capture footage
Why Most Mac Guides Require Three Apps
Search for "add background music to screen recording mac" and nearly every result walks through a multi-app chain:
- Virtual audio driver — BackgroundMusic (free, open-source) or Loopback (~$99) — routes internal audio so QuickTime can capture it alongside a music source
- QuickTime Player for the screen capture itself
- iMovie, Final Cut Pro, or DaVinci Resolve to import the music file and mix it with the recording
This works, but carries a documented risk: virtual audio drivers route audio through macOS's Core Audio HAL (Hardware Abstraction Layer), and clock synchronization between the virtual device and real audio hardware introduces jitter — cumulative timing errors that produce A/V drift in recordings longer than 10 minutes. BackgroundMusic's GitHub issues tracker lists this as an open, unfixed limitation on recent macOS versions.
How to Add Background Music to a Screen Recording on Mac with Clipa
Clipa 1.0.1 introduced native external audio file import directly in the Sound Tab — no virtual drivers, no audio routing, no third-party dependencies.
Step 1: Record Your Screen in Clipa
Open Clipa and select a capture mode:
- Full Screen — captures the entire display at native resolution
- Window — follows a specific application window
- Custom Area — drag-select any region
- Preset Format — records at a fixed output resolution (1080p, 4K, etc.)
Clipa records system audio and microphone audio as separate tracks from the start — they remain unmixed, giving you full post-production control.
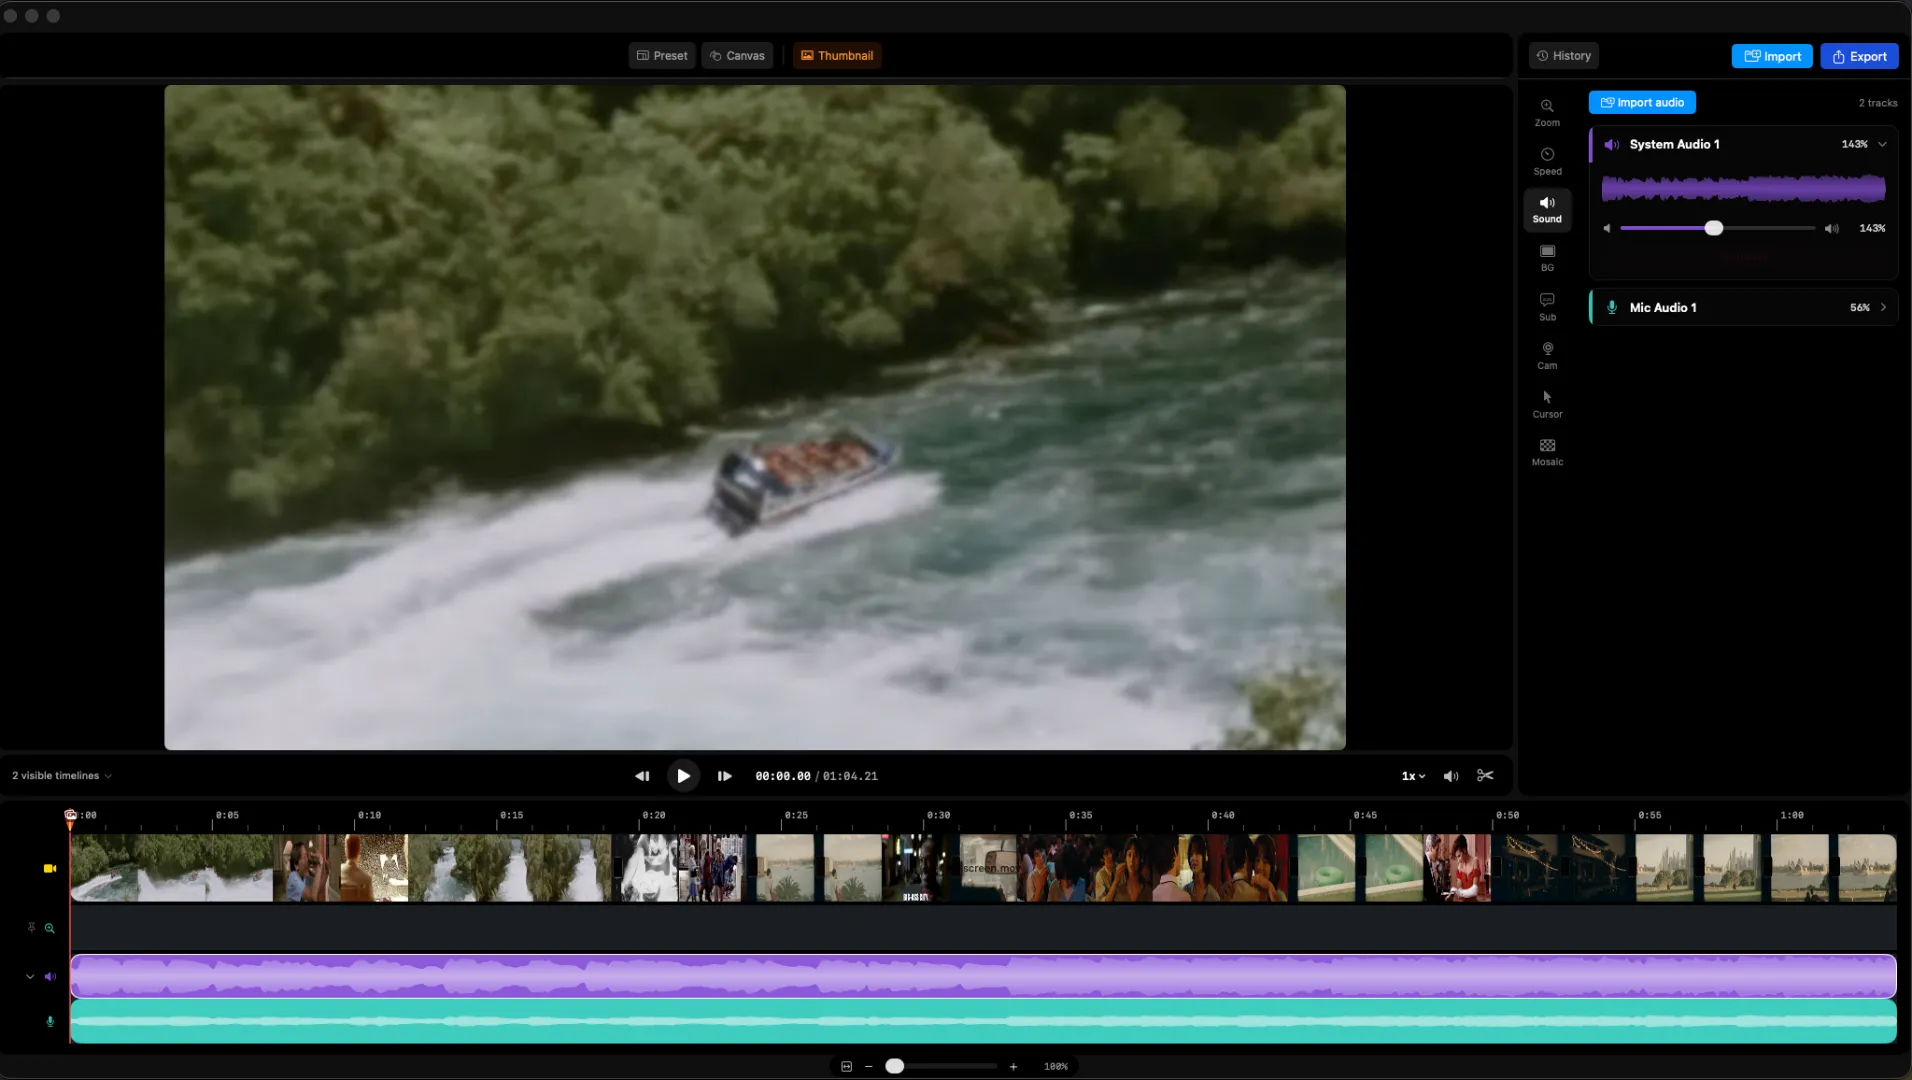
Step 2: Open the Editor and Navigate to the Sound Tab
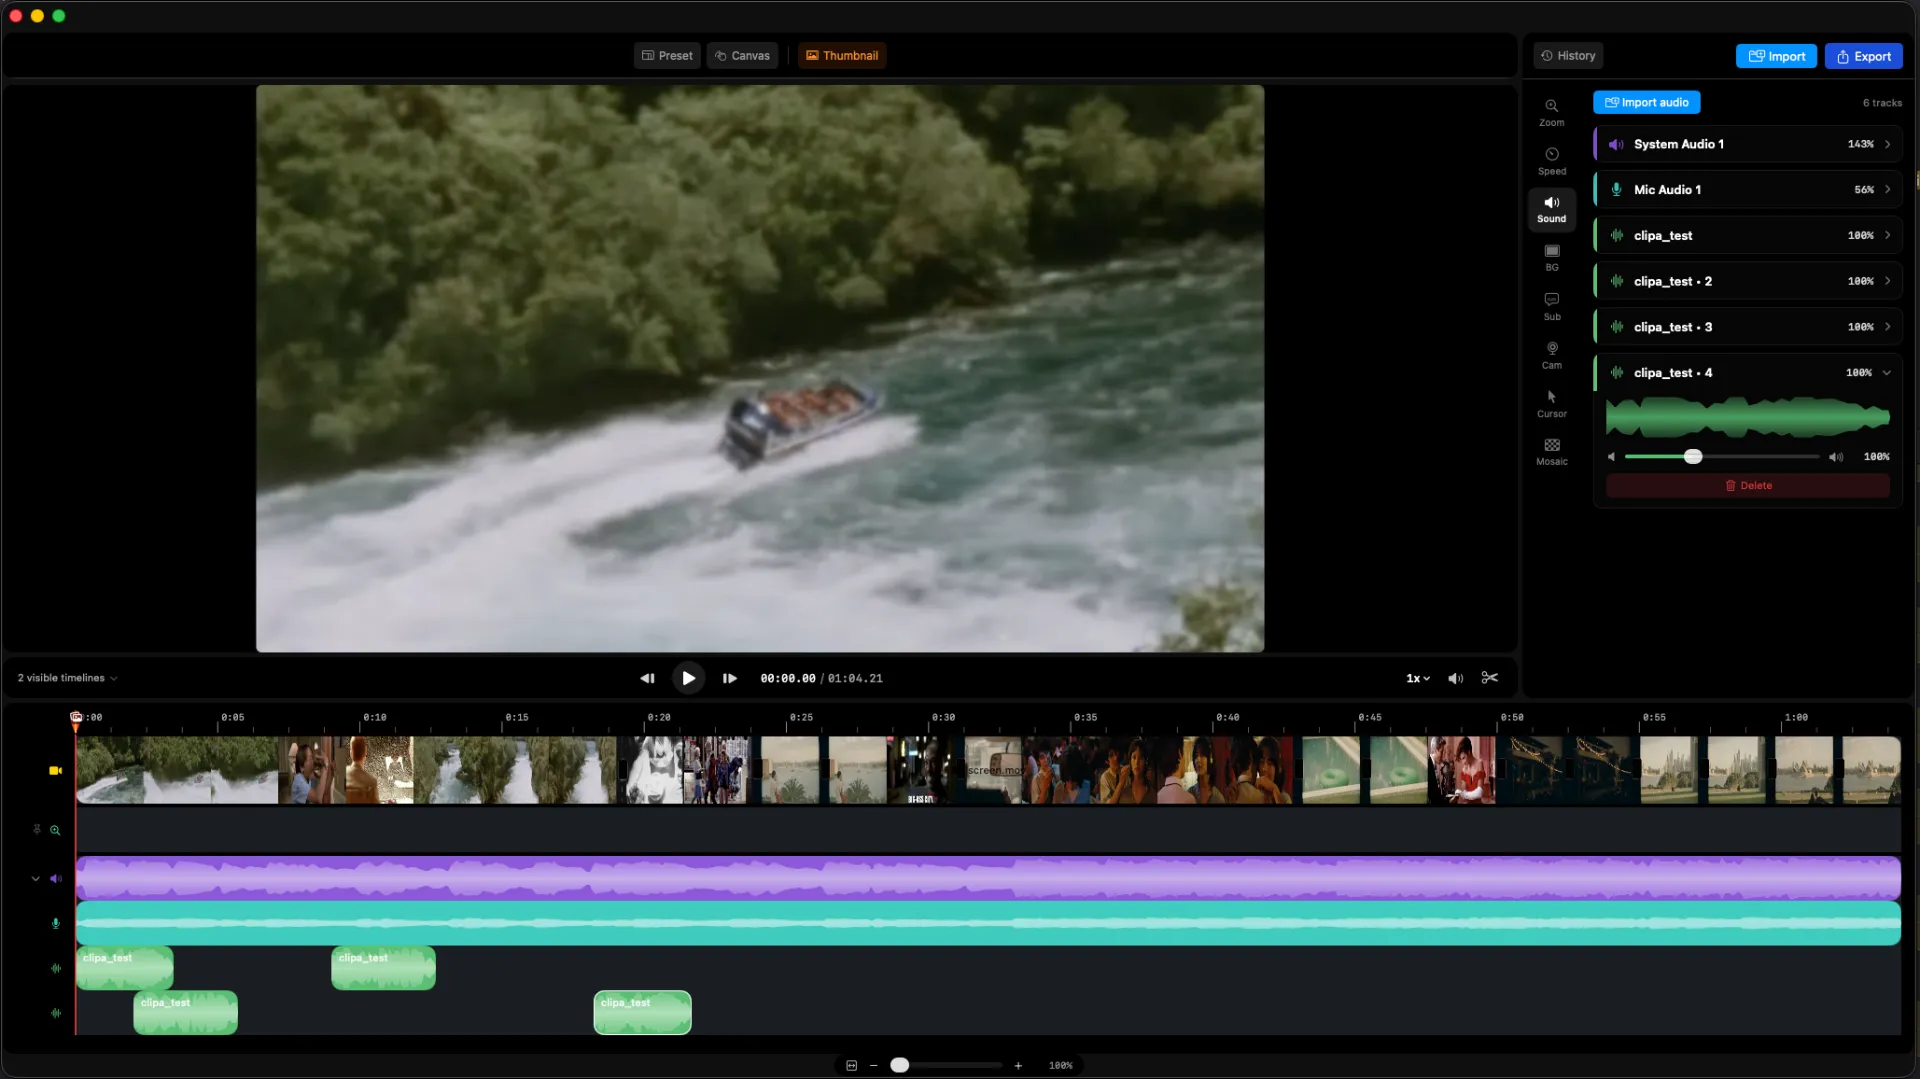
When you stop recording, Clipa opens its built-in editor automatically. Click the Sound tab in the sidebar.
Two tracks appear immediately:
- System Audio — everything macOS played during the recording
- Microphone — your voiceover or room audio
Both are displayed as waveform segments synchronized to the video timeline.
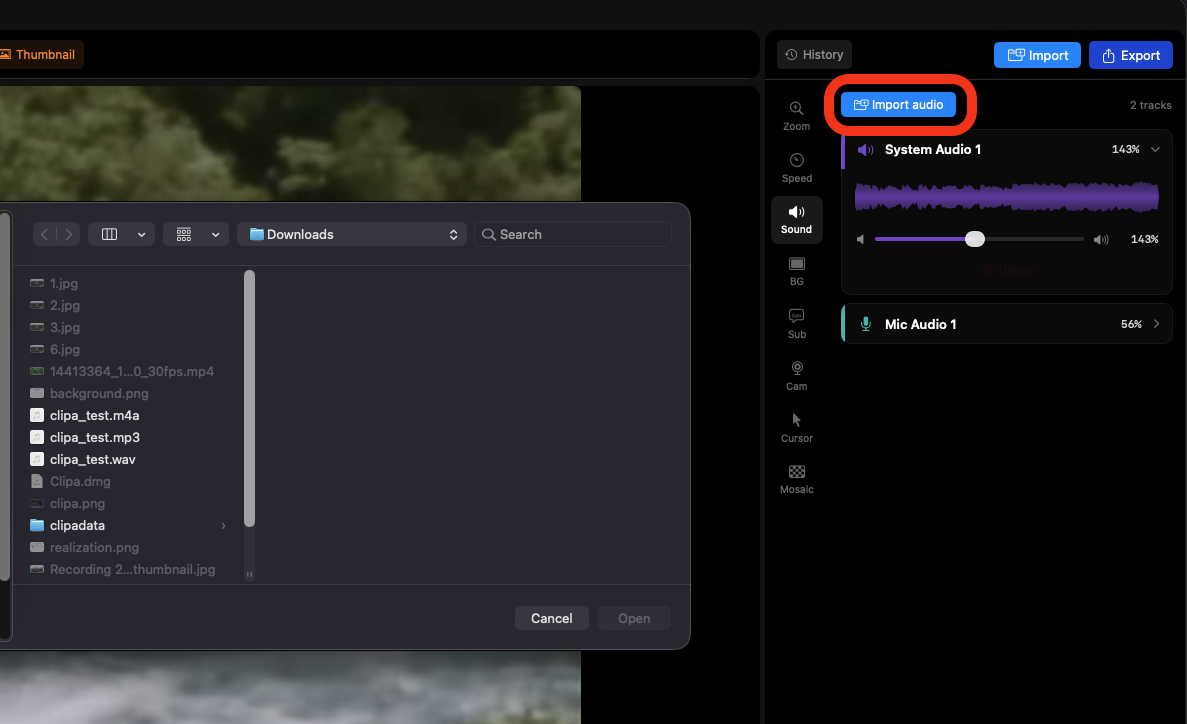
Step 3: Import Your Audio File
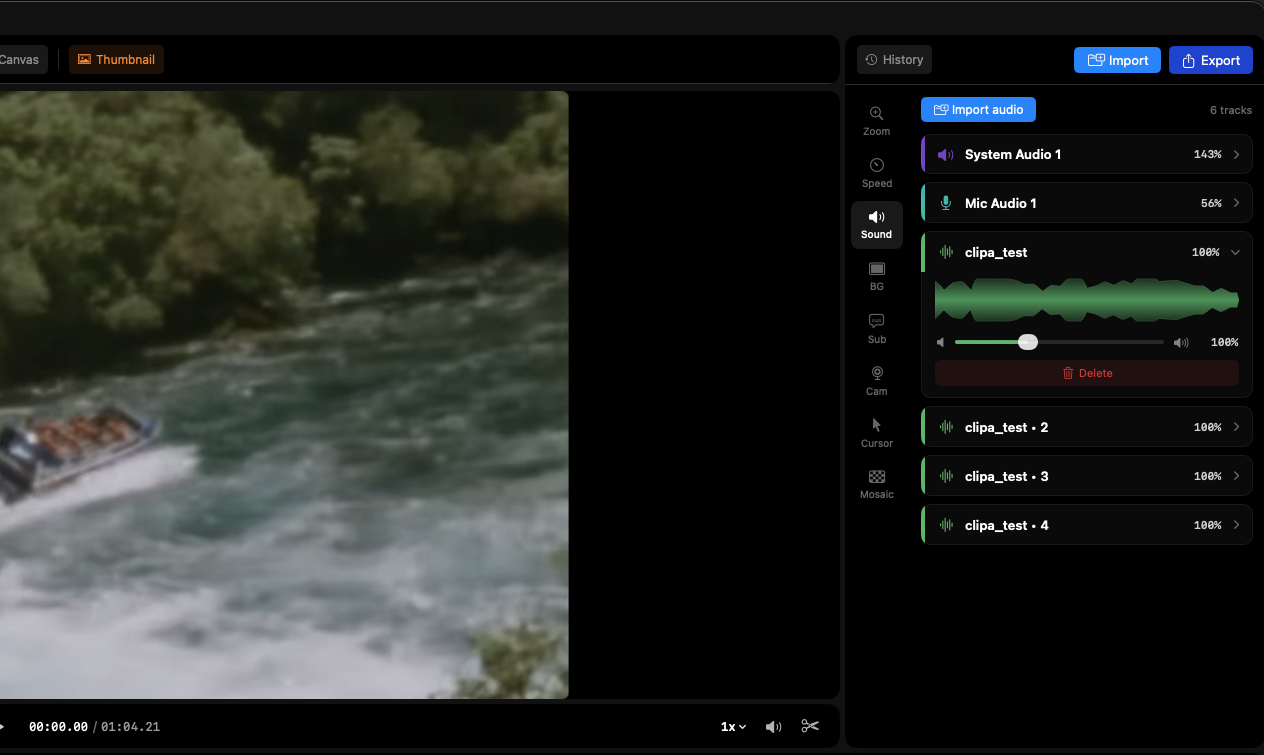
Click Import in the Sound Tab toolbar. Clipa accepts MP3, AAC, WAV, and AIFF files. Your music track appears as a third waveform segment, placed at the beginning of the timeline by default.
Step 4: Position the Track on the Timeline
Drag the imported audio segment horizontally to align it with your video content. Practical arrangements:
- Full-length bed: position the track to cover the entire recording duration
- Bookend music: place it at the intro and outro, fading before narration begins
- Accent drop: align the track to a specific timeline marker for emphasis
Clip handles at either edge let you trim the audio's in-point and out-point without affecting the video.
Step 5: Set Mix Levels
Select each audio segment and adjust its volume. These starting levels work well for tutorial and demo videos:
| Track | Starting Level |
|---|---|
| Microphone (voiceover) | 0 dB (reference) |
| System audio | –6 to –12 dB |
| Background music | –18 to –24 dB |
Adjust based on your microphone's output level and the dynamic range of the music track. Use Clipa's playback to confirm the balance at a realistic listening volume before committing to export.
Step 6: Preview and Export
Play back the recording. Clipa's A/V sync — improved in version 1.0.1 — keeps audio and video frame-accurate through both playback and export.
When the mix sounds right, click Export and choose a preset:
- YouTube — H.264, AAC stereo, up to 4K
- TikTok — 9:16 vertical, H.264
- Instagram — 1:1 or 4:5
- Custom — manual codec, resolution, and bitrate settings
All encoding runs locally on Apple Silicon (with Neural Engine acceleration) or Intel Mac hardware. No file is uploaded to a cloud server.
Why File-Based Mixing Avoids A/V Drift
When a virtual audio driver routes music through Core Audio's HAL, the driver and the physical audio hardware run on separate sample clocks. CoreAudio uses a software phase-locked loop (PLL) to synchronize them, but small residual errors accumulate over time — a phenomenon called clock drift. At a 44,100 Hz sample rate, even a 1 ppm clock difference produces roughly 44 samples of drift per second, translating to approximately 1 millisecond of A/V offset per second of recording.
Clipa takes a different approach: background music is added as a post-production file reference keyed to the video frame index, not to a live audio clock. The track's position is deterministic — no PLL, no drift. This is the same architectural reason professional non-linear editors (Final Cut Pro, DaVinci Resolve, Adobe Premiere Pro) add background music in post rather than routing it at capture time.
Honest Scope: What Clipa Doesn't Include
- No built-in music library: Clipa imports your own audio files. For royalty-free tracks, the YouTube Audio Library and Free Music Archive are reliable starting points.
- No audio effects or EQ: Clipa mixes levels and positions clips; it doesn't master audio. If you need EQ or compression, process the file in GarageBand (free on macOS) before importing.
- No live audio routing: Clipa is a recording and editing tool, not a real-time mixer. For live audio mixing during a stream, OBS Studio is the appropriate tool.
Clipa vs. the Multi-App Route
| QuickTime + BackgroundMusic + iMovie | Clipa 1.0.1 | |
|---|---|---|
| Virtual audio driver required | Yes | No |
| A/V drift risk | Present (clock jitter in longer recordings) | None (file-based, frame-indexed) |
| Audio formats supported | MP3, AAC, WAV (via iMovie) | MP3, AAC, WAV, AIFF |
| macOS Sequoia (15) support | BackgroundMusic: limited | Full (macOS 15+) |
| Apps required | 3 (plus optional Loopback) | 1 |
One clarification: if you need to capture and mix audio in real time during a livestream, OBS Studio remains the right tool for that use case. Clipa is purpose-built for screen content — tutorials, product demos, walkthroughs — where post-production audio mixing is the norm.
Summary
Adding background music to a screen recording on Mac no longer requires a pipeline of virtual drivers and separate editors. With Clipa 1.0.1:
- Record your screen — system audio and mic captured as independent tracks
- Open the editor → Sound Tab
- Import an audio file (MP3, AAC, WAV, or AIFF)
- Drag the track to position on the timeline
- Set mix levels (–18 to –24 dB is a solid baseline for background music)
- Preview, then export using any preset
No virtual drivers. No multi-app handoffs. One native Mac window.