How to Export Screen Recording for YouTube on Mac
Export screen recording for YouTube on Mac by matching your capture, edits, audio, and final file settings before upload.
A YouTube-ready screen recording is not only a clean recording. It is a chain of decisions that starts before you press record and ends when the exported file still looks sharp after upload. If the capture is oversized, the cursor is hard to follow, the audio is uneven, or the export settings fight the source footage, the final video can feel less polished than the work behind it.
Clipa is built for that full Mac workflow: record the screen, clean the timeline, add visual emphasis, and export without moving the project through a heavy editor. This guide shows a practical path for exporting a screen recording for YouTube on Mac, with settings that fit tutorial, product demo, course, and creator workflows.
Export screen recording for YouTube on Mac: the short version
Use this as the export checklist before you upload.
- Record only the screen area that matters. Window or area capture often produces a cleaner teaching video than a full-display recording.
- Keep the source frame rate consistent. YouTube recommends keeping uploaded video at the same frame rate it was recorded in, including common 30 fps and 60 fps workflows: YouTube recommended upload encoding settings.
- Export an MP4 when you want the safest upload path. YouTube's recommendations list MP4 with H.264 video and AAC-LC audio as a standard upload format: YouTube upload encoding settings.
- Choose the resolution for the viewer's job. 1080p is usually enough for product demos and tutorials, while 4K can help when small UI text needs to stay readable after compression. YouTube publishes separate bitrate guidance for 1080p and 4K uploads in its upload settings documentation: YouTube recommended bitrates.
- Listen through the exported file before uploading. A good-looking recording still fails if the microphone is too low or system audio covers the narration.
Start with a cleaner Mac screen recording
You can record your Mac screen with Apple's built-in Screenshot toolbar or QuickTime Player. Apple's own guide covers full-screen and selected-area recording, including microphone options and save behavior: Apple Support: record your screen on Mac. That built-in route is useful for quick captures.
The tradeoff appears after the recording. A raw capture often needs trimming, zoom emphasis, audio cleanup, or a YouTube-specific export. If you record with one app, edit in another, and compress somewhere else, every handoff adds room for mismatch.
Clipa keeps that workflow in one native Mac app. A typical YouTube screen video can start with display, window, or area capture. It can include microphone audio, system audio, and a camera overlay when the video needs a presenter. After recording, the same project moves into an editor where cuts, zooms, cursor emphasis, audio tracks, and export choices stay together.
That matters for YouTube because viewers usually decide whether to keep watching before they admire your production stack. The screen should show the right area. The cursor should guide the eye. The speaker should sound close enough. The export should preserve the work instead of flattening it.
Edit before you export
Most export problems are editing problems that reached the upload stage. The file may technically match YouTube's recommendations, but the video can still feel slow or unclear.
Before exporting, review the timeline with these questions.
- Does the first visible action arrive quickly enough?
- Can the viewer read the UI text without pausing?
- Does each zoom segment point to a real decision or detail?
- Are long waits, loading states, and repeated attempts trimmed out?
- Do system audio and microphone audio support the explanation instead of competing with it?
Clipa's editor is useful here because screen recordings are not normal camera footage. A product walkthrough may need a close-up on a small button. A bug report may need the cursor path to be obvious. A course lesson may need background audio to stay below narration. The final export settings cannot fix those choices after the fact.
Use cuts to remove setup time. Use zoom effects to show where the viewer should look. Use cursor styling when the pointer is part of the lesson. If the video includes voice, check the sound timeline before export. Recent Clipa releases have focused on audio sync, segment speed behavior, and export reliability, which are exactly the areas that can make or break a YouTube tutorial.

Choose export settings that match the source
The safest export is usually the one that respects the recording you already made.
If you recorded a straightforward product demo at 30 fps, exporting at 30 fps keeps motion natural and avoids inventing frames that do not add value. If you captured fast cursor movement, smooth scrolling, or a high-motion app workflow at 60 fps, exporting at 60 fps can preserve that motion. YouTube's guidance is to upload video at the same frame rate used for recording: YouTube frame-rate guidance.
For resolution, start with the final viewing context. A tutorial with large UI elements can work well at 1080p. A code walkthrough, analytics dashboard, design tool, or dense SaaS interface may need more pixels. If the source capture and edit are clean, a 4K export can keep small UI text clearer after YouTube compression. YouTube publishes upload recommendations for both 1080p and 4K content, including separate bitrate ranges for standard and high frame rate uploads: YouTube recommended video bitrates.
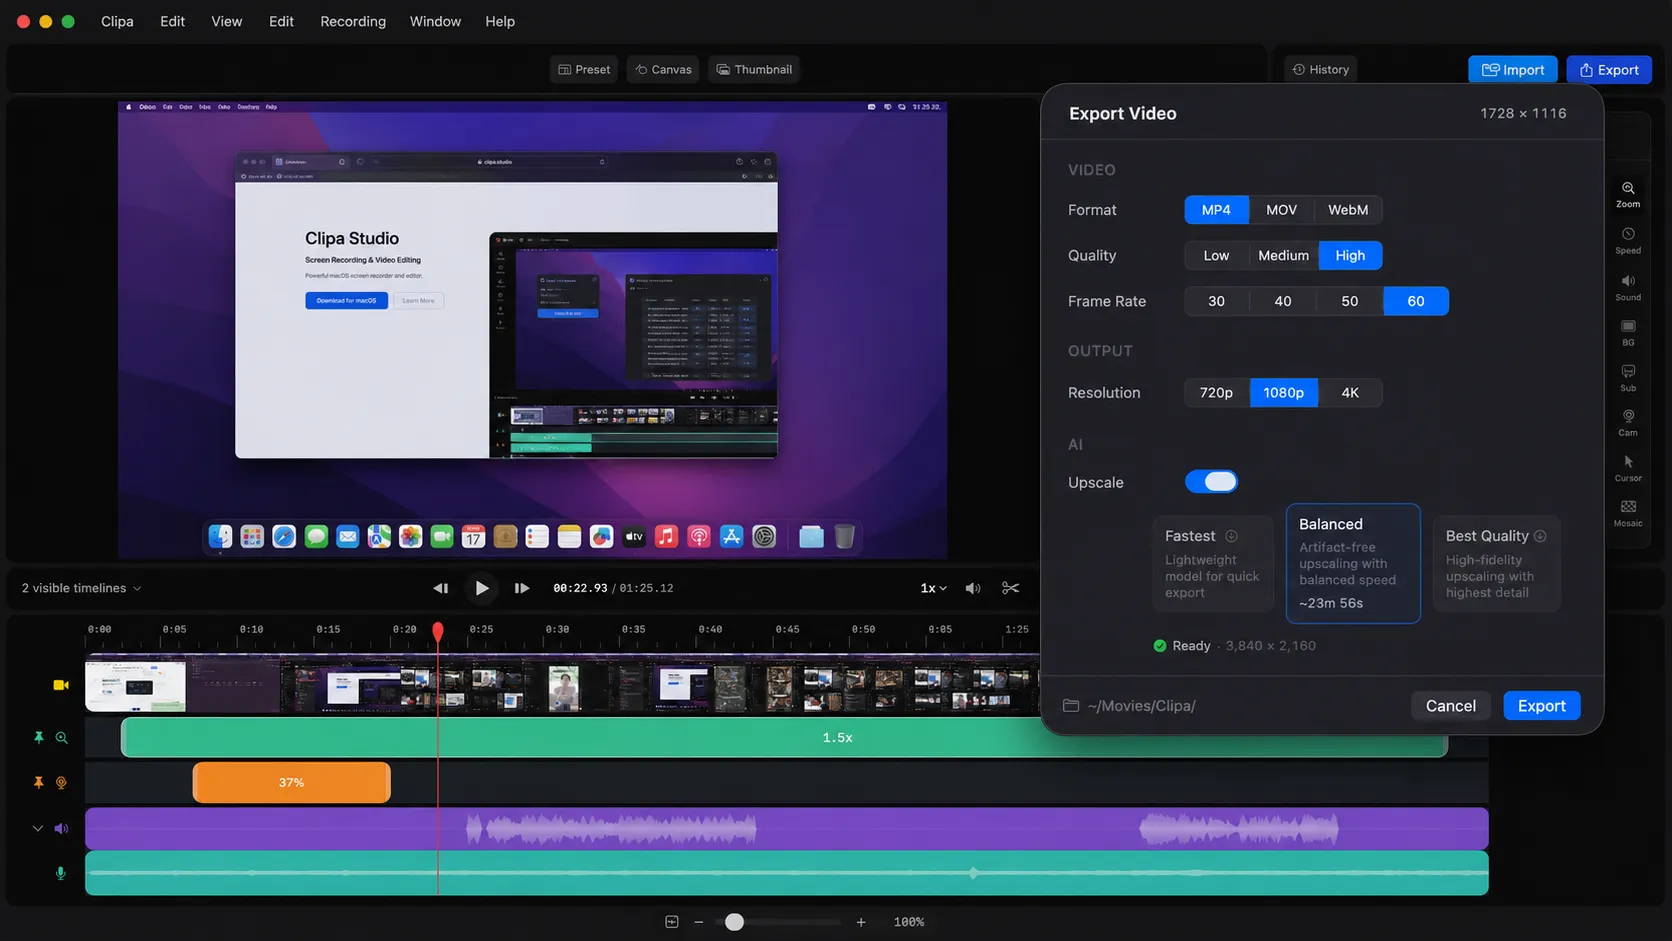
Clipa's export dialog is designed around those practical choices. You can choose MP4, MOV, or WebM, set quality, choose frame rate, select output resolution, and use AI upscaling when higher-resolution output is appropriate. The point is not to make every video the biggest possible file. The point is to export a file that matches the viewer's needs and the source material.
Use MP4 unless you have a reason not to
For most YouTube uploads, MP4 is the default choice. It fits YouTube's recommended upload path and avoids the compatibility questions that come with less common containers. MOV can still be useful in Mac-first workflows, especially when you plan to continue editing elsewhere. WebM may fit specific web workflows. For a finished YouTube upload, MP4 is usually the cleanest handoff.
Container choice is only one part of quality. Audio matters too. YouTube's recommendations include AAC-LC audio and a 48 kHz or 96 kHz sample rate in its upload encoding settings: YouTube audio recommendations. In practice, that means you should not treat audio as an afterthought. Normalize the speaking level in your edit, reduce distracting background music, and export a short test if the project has several audio sources.
Clipa is especially helpful when a screen recording includes both system sound and narration. You can review the tracks in the editor before export instead of discovering a balance problem after upload.
Export for the platform, not the editor preview
The editor preview is where you make decisions. The exported file is what YouTube receives. Always review the exported file before upload.
Watch for four things.
First, check timing. Zooms, cuts, and camera overlays should appear when expected. Recent Clipa updates improved zoom accuracy in export and helped exported timing match the editor preview more closely.
Second, check text readability. If the recording shows code, settings, spreadsheets, or dense UI, play the export at the size a viewer will actually use. A detail that looks clear on your monitor may disappear in a small embedded player.
Third, check audio sync. Speak a short phrase near a visible click or UI change when recording. That gives you an easy sync reference later.
Fourth, check file size only after you have checked clarity. Compression is a tradeoff. A smaller file is useful, but not if it makes a tutorial harder to follow.
When 4K export helps a screen recording
4K is not automatically better. It helps when the source is detailed enough and the viewer benefits from extra clarity. For a screen recording, that often means small interface text, spreadsheet cells, code editors, design panels, or product dashboards.
If your original capture is low resolution or heavily scaled, 4K export will not recreate lost detail by itself. AI upscaling can help prepare a higher-resolution export when the source is clean enough, but it should support the workflow rather than hide poor capture choices. Start with a focused capture area, keep important UI elements readable, and then decide whether a higher-resolution export is worth the upload size.
This is where Clipa's export workflow is practical. You can edit the recording for clarity, choose the resolution, and enable upscaling when it matches the project. A product demo may stay at 1080p. A code tutorial may benefit from 4K. A short social cut may need a completely different format later.
A repeatable YouTube export workflow in Clipa
Use this workflow when you want a clean YouTube upload without turning every screen recording into a full post-production project.
- Capture the right source. Choose screen, window, or area capture based on the video job.
- Record with the right audio. Use microphone audio for explanation and system audio only when it adds context.
- Trim the timeline. Remove setup, pauses, repeated clicks, and failed takes.
- Add visual emphasis. Use zooms and cursor styling to guide attention.
- Check audio balance. Make sure narration stays clear when system audio or music is present.
- Open export. Choose MP4 for the typical YouTube handoff.
- Match frame rate. Keep 30 fps or 60 fps aligned with the source recording when possible.
- Pick resolution. Use 1080p for normal tutorials and consider 4K for dense UI.
- Review the exported file. Watch the exact file before uploading.
This sequence is simple, but it prevents the most common screen-recording export failures. The video is not judged by the export dialog. It is judged by whether the viewer can follow the screen.
Final checklist before uploading
Before you send the file to YouTube, run one last pass.
- The first useful action appears early.
- The cursor is visible when it matters.
- Zooms make the explanation clearer.
- Microphone audio is easy to hear.
- System audio does not overpower narration.
- The export uses a platform-friendly format.
- The exported file plays correctly outside the editor.
If you make screen videos often, this checklist becomes fast. The value is consistency. You spend less time rescuing exports and more time making the tutorial, demo, or lesson clear.
Clipa gives Mac creators a focused path from capture to edit to export. Record the screen, polish the timeline, choose YouTube-ready export settings, and keep the workflow local on your Mac. Download Clipa at https://www.clipa.studio and prepare your next screen recording for upload with fewer handoffs.