
How to Share Screen Recording Online on Mac
Share screen recording online when the file is ready, not after a second upload chore. On Mac, the cleaner path starts at export.
A screen recording is rarely finished when the red stop button disappears. You still need to trim dead air, make the important click readable, choose a format, and send the result to someone who can watch it without downloading a bulky file. That last step is where many Mac workflows become messy.
Built-in Mac tools can record the screen. Apple documents both the Screenshot toolbar and QuickTime Player screen recording flows for local capture and saving. Those are useful starting points, especially when you only need a raw local file. They do not turn a polished edit into a review-ready link by themselves. That usually means exporting a file, opening another upload tool, waiting again, then copying a link from a separate service.
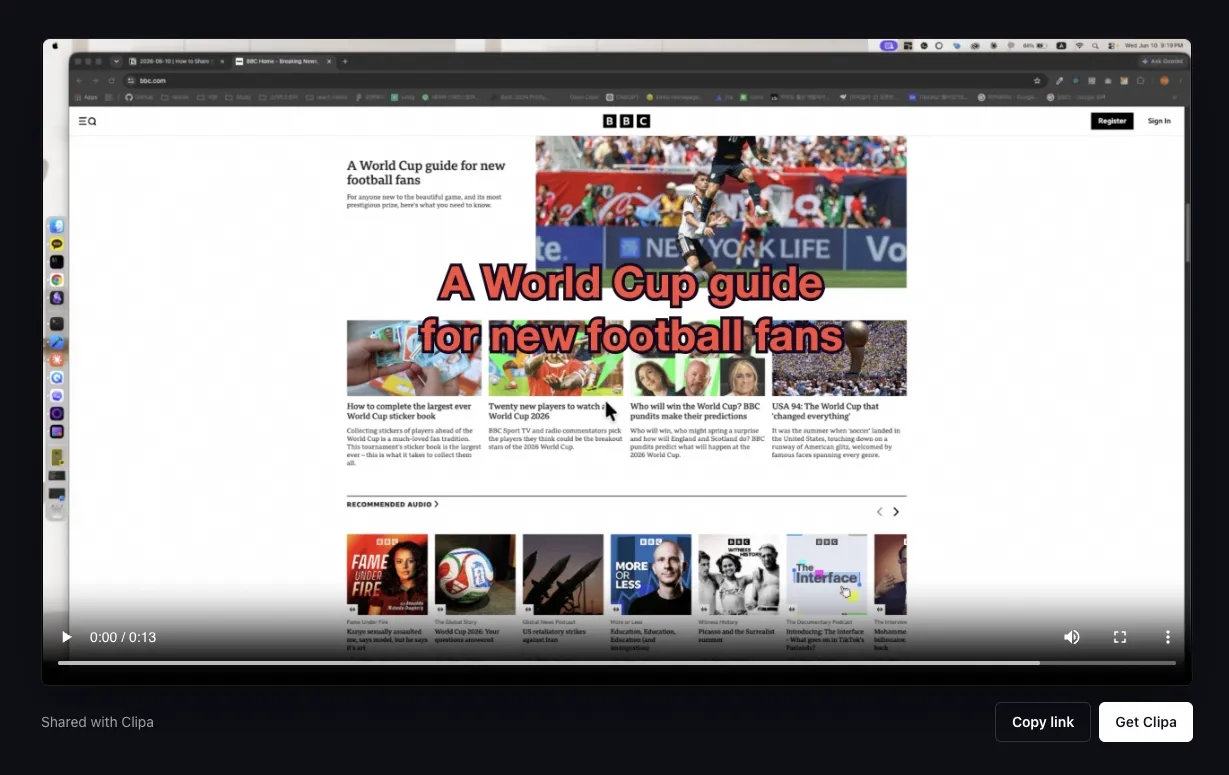
Clipa's Share Link Export is designed for the moment after editing. You record and polish the video in the same Mac app. At export, Pro users can choose Public Link, create an MP4 share link, and copy the URL when the link is ready. If the project has a saved thumbnail, Clipa can use it as a poster image for a clearer preview.
Why a Link Is Better Than Sending the File
People search for this workflow because screen recordings are usually made for someone else. A founder sends a product walkthrough to a customer. A developer sends a bug reproduction to a teammate. A teacher sends a mini lesson. A creator sends a draft to a collaborator.
In each case, the viewer wants a playable video. They do not want to manage a download, find the right app, or wonder which version is current. A link also fits the places where work already happens: Slack, Discord, email, Notion, Linear, GitHub, and social messages.
The common alternative is a file transfer. That can work for archive delivery or final handoff. It is less convenient for quick review. A downloaded file gives the recipient more friction before they can react. It also makes versioning harder when you send a revised export later.
A link-first workflow is better when the goal is feedback, approval, or explanation. The recording becomes something people can open, watch, and respond to. The exported file still matters, but the sharing step no longer has to be a separate project.
How to Share Screen Recording Online on Mac with Clipa
The shortest Clipa workflow is simple: record, edit, export as a public link, then copy the URL. The key difference is that the link is created at export time. You do not need to render a file and then repeat the upload in a browser.
Start with a recording that matches the viewer's job. If you are explaining a product flow, capture only the app or area that matters. If you are showing a bug, include enough surrounding context for the viewer to reproduce it. If you are teaching a workflow, slow down on the steps that require attention.
After recording, clean the timeline before you share. Trim the beginning and ending. Remove waits that do not help the viewer. Add zoom where a click or small UI element matters. Adjust audio so speech is understandable. Use a thumbnail when the link will be pasted into a chat or shared with someone who sees many links each day.
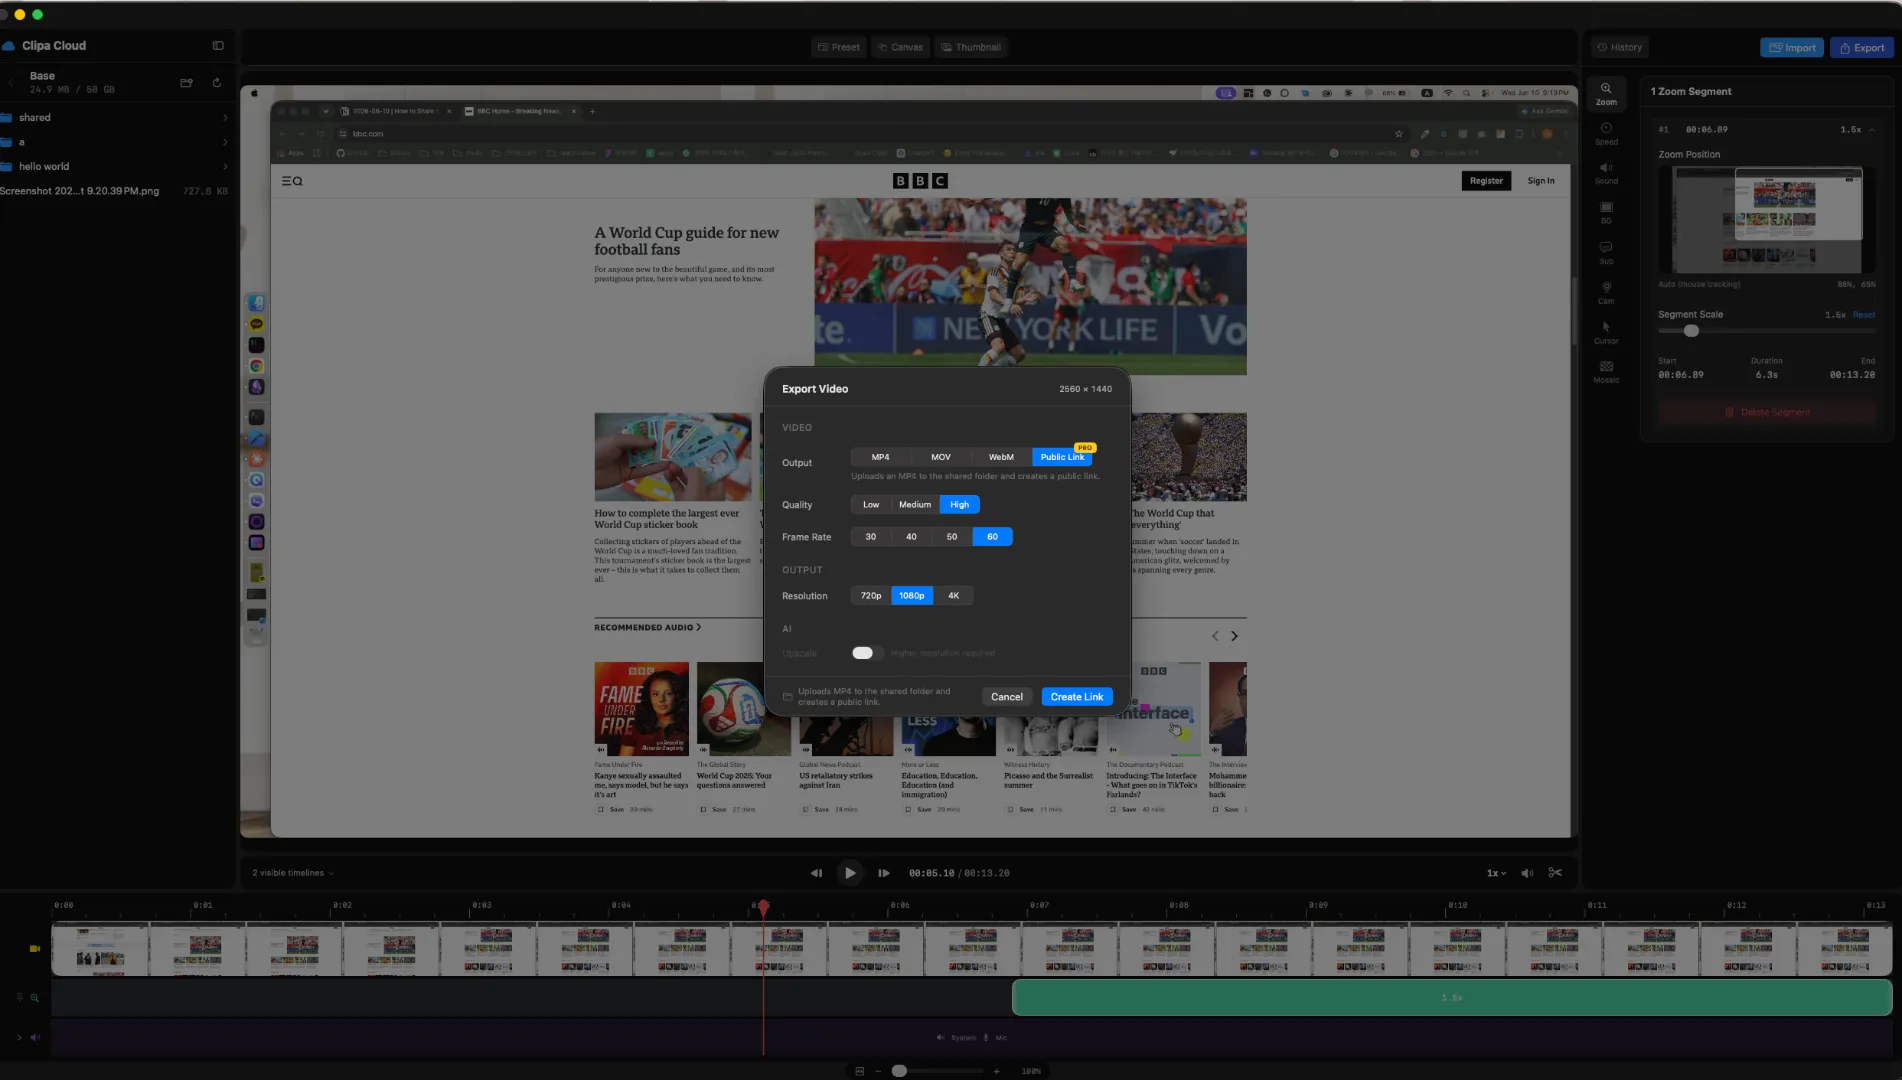
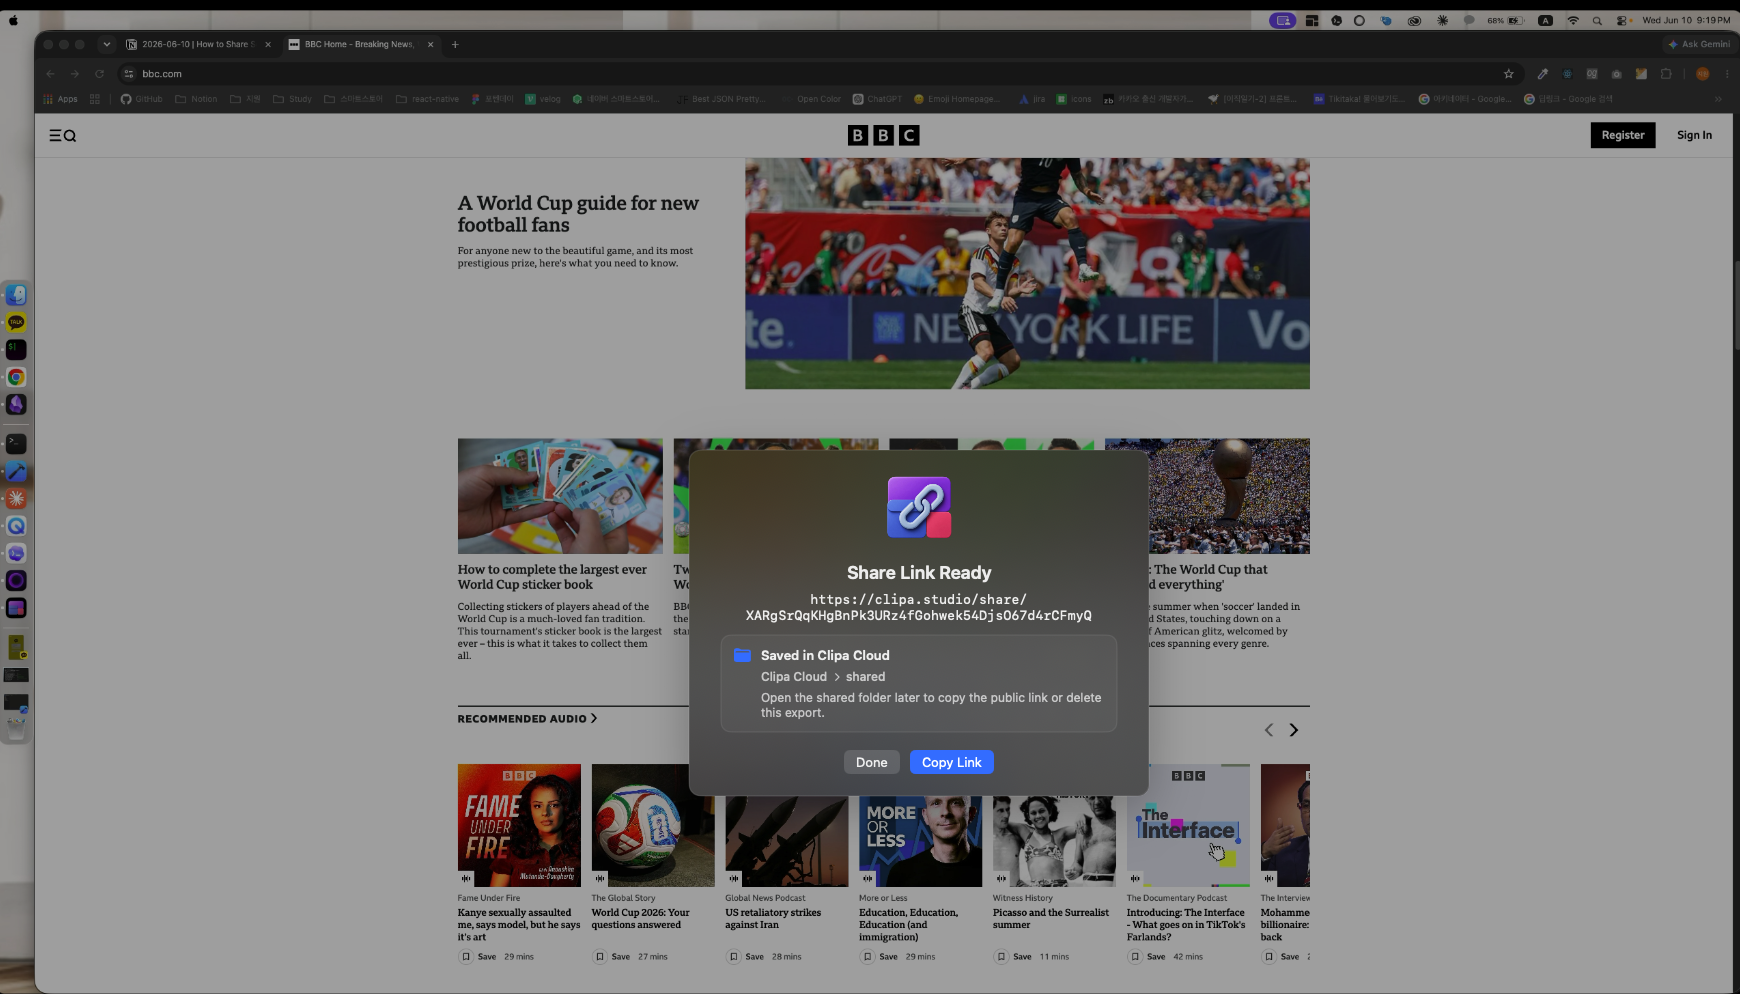
Then open Export Video and choose Public Link. Clipa uses MP4 for the share-link output, uploads the completed export to the protected shared area in Clipa Cloud, and creates a public URL for that exported video. When the Share Link Ready modal appears, copy the link and send it where the conversation is happening.
Step 1: Record for the Viewer
A good shared recording starts before export. It starts with the viewer's question.
For a customer demo, show one clear outcome. Do not record every menu unless the menu is part of the value. For a bug report, start a few seconds before the failure. Give the developer enough context to understand the state. For a tutorial, record the exact path the learner should repeat.
Mac users have several capture options. Apple's Screenshot app can record the whole screen or a selected portion. QuickTime Player can also open the Screenshot tools for screen recording. Developers building capture-heavy Mac apps can use ScreenCaptureKit, which Apple describes as a framework for high-performance frame capture of screen and audio content.
Clipa is built for people who need capture and editing in one workflow. That matters when the recording will be shared with someone else. The person watching the link will not know how much work went into the edit. They will only notice whether the point is clear.
Step 2: Polish the Recording Before Sharing
Do not use link sharing as a shortcut around editing. A faster share step works best when the video itself is already focused.
Trim the dead space at the beginning. Cut the moments where nothing changes on screen. Add zoom to small UI details. Keep the cursor visible when the viewer must follow an action. If audio is part of the explanation, play the export preview before sharing. A short review can catch volume problems that are easy to miss while editing.
This is also the right moment to think about format. Share links should be easy to play in a browser. MP4 is the practical default for most screen recording delivery because viewers expect it to open without special handling. Clipa's Public Link export path uses MP4 so the shared result is aimed at playback, not project exchange.
When the recording is a draft, say so in the surrounding message. A link makes review easier, but it does not replace context. Tell the viewer what you want: approval, comments, bug confirmation, or a quick reaction.
Step 3: Choose Public Link at Export
In Clipa, Public Link appears in the export output options. If it is unavailable, the reason is shown in the export sheet. The current flow requires an online connection, sign-in, and an active Pro subscription. That is intentional because the workflow uses Clipa Cloud to host the exported video.
When you click Create Link, Clipa first renders the video. It then uploads the export and creates the public URL. The progress view separates the export and link-creation phases so you are not left guessing what is happening.
Once the link is ready, Clipa shows the public URL in a Share Link Ready modal. You can copy it immediately. The exported item is also saved in Clipa Cloud's protected shared folder, where you can copy the public link again later or delete the shared export.
This is not the same as turning your whole Cloud Library into a public drive. Clipa Cloud Library remains a private workspace for Pro users. Share Link Export is a specific export path for completed videos. That boundary keeps the sharing action tied to finished exports rather than every file in your cloud library.
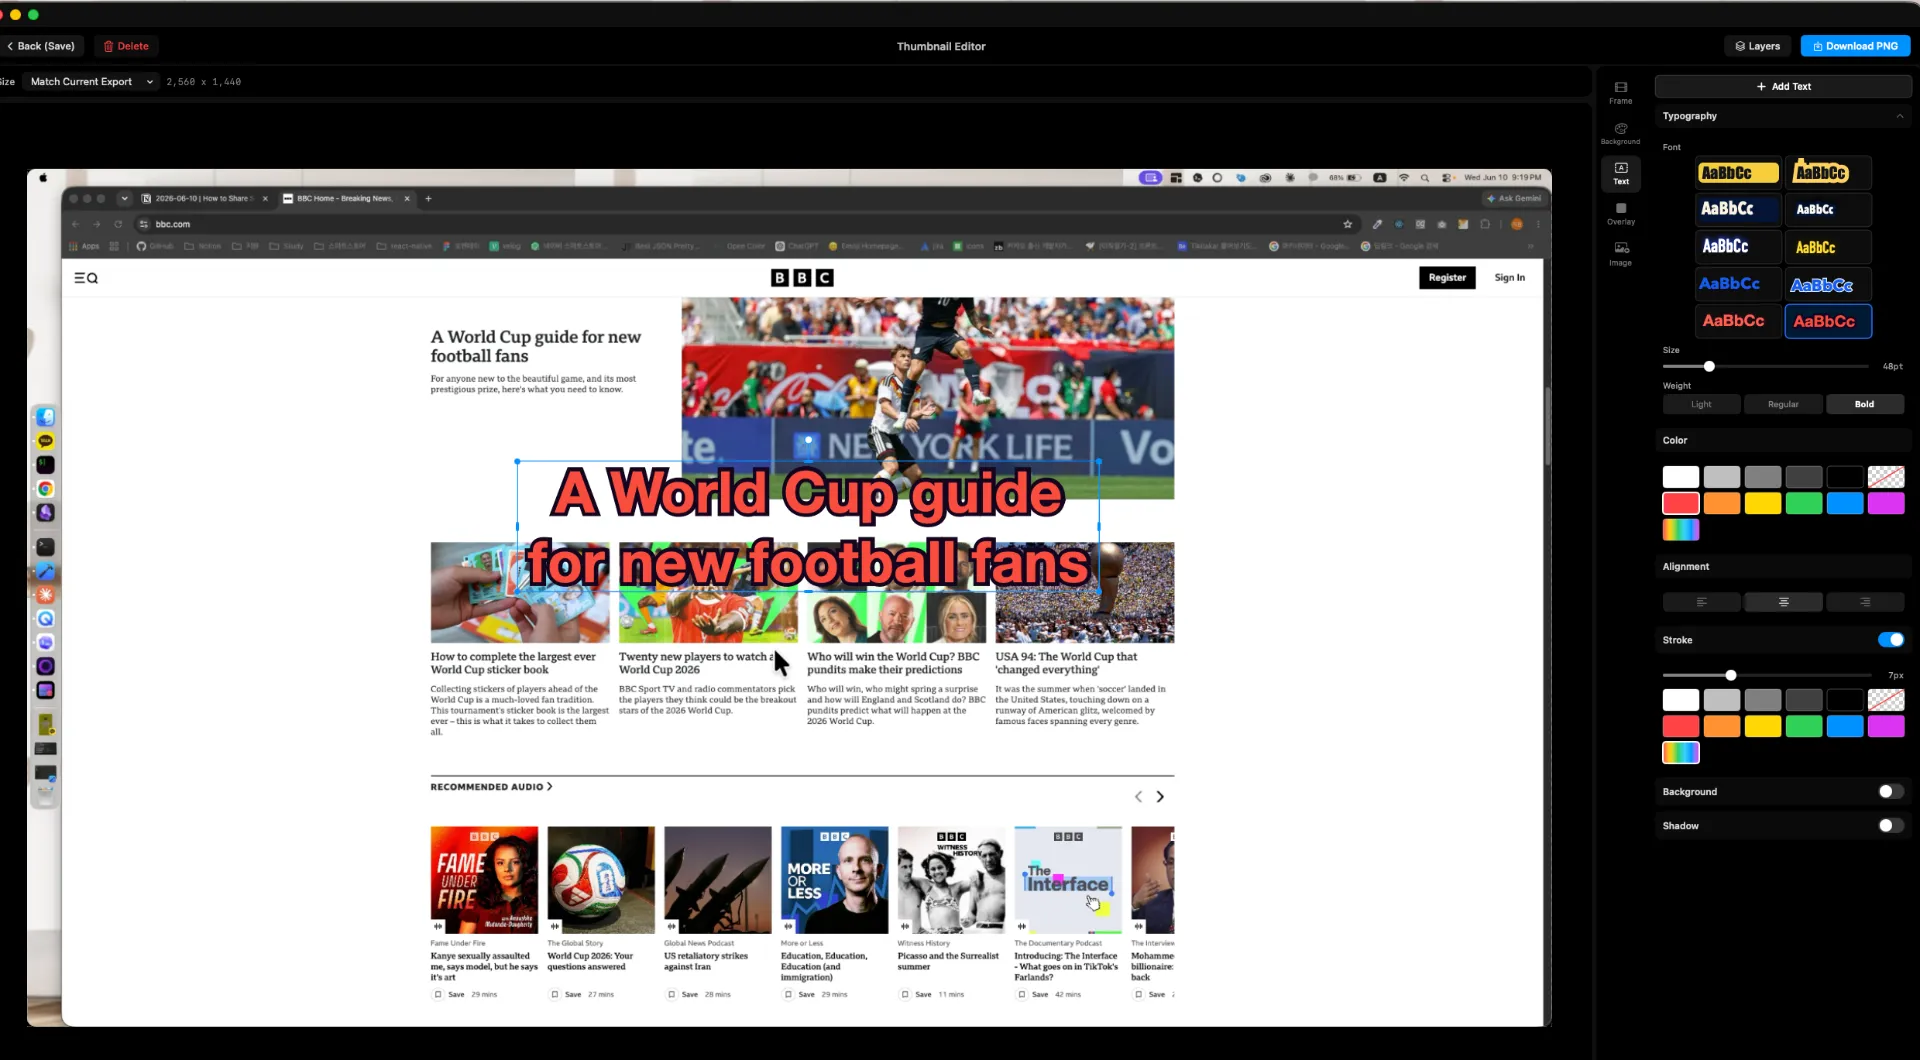
Step 4: Add a Thumbnail for Better Link Previews
A thumbnail is not decoration. It sets expectations before the viewer presses play. If the shared recording explains a product feature, the thumbnail can show the final state. If it is a tutorial, the thumbnail can show the most important screen. If it is a bug report, the thumbnail can show the state just before the issue.
Clipa's release notes for the new Share Link option include optional thumbnails for clearer previews in chats and social apps. That matches how web video works in general. MDN documents that a video poster image is shown before video data is available. In practice, a poster helps a link feel intentional instead of anonymous.
Keep the thumbnail simple. Use a readable frame. Avoid tiny text. If you add a title, make it short. The best thumbnail for a screen recording often answers one question: what will I understand after watching this?
Step 5: Send the Link with Useful Context
The link is only half the handoff. The message around the link tells people how to respond.
For a product demo, write one sentence about the action you want the viewer to notice. For a bug report, add the expected result and the actual result. For a tutorial review, ask whether the steps are clear. For a client approval, state whether the video is a draft or final.
Here are simple message patterns:
- Product demo: "Here is the two-minute walkthrough of the new onboarding flow. I am looking for feedback on the first action and final CTA."
- Bug report: "This recording shows the export button becoming disabled after the second retry. Expected result: the button should recover after the network returns."
- Tutorial: "This is the draft lesson for importing media. Please check whether the cursor zoom makes each step easy to follow."
- Client review: "Here is the latest export. If the pacing looks good, I will publish this version."
The point is not to make the message long. The point is to make the viewer's job clear before they click.
When QuickTime, iCloud, or a Dedicated Link Makes Sense
QuickTime and the Screenshot toolbar are good when you need a quick local recording. They are built into macOS, and Apple keeps the flow simple. If your task is to capture a raw clip for yourself, that may be enough.
iCloud Drive can share files and folders through Apple's sharing flow. That is useful when you already manage files in iCloud and want file-level collaboration. It is less focused on the recording-editing-export loop.
A video host or browser recorder can be useful when the whole task happens in the browser. Many search results for this topic are built around instant web recording or generic video upload. That can be convenient. It can also separate capture, editing, and final Mac export into different tools.
Clipa fits a different workflow. It is for Mac users who want to record, edit, export, and share a screen video from one native app. The link is not the whole product. It is the final handoff after the recording has been cleaned up.
Share-Link Checklist Before You Send
Before you paste the URL, run a quick check:
- Does the first screen tell the viewer what they are watching?
- Is the cursor or zoom clear enough for small UI details?
- Is the audio understandable on laptop speakers?
- Did you remove waiting time that does not help the viewer?
- Is the export format aimed at playback rather than project transfer?
- Does the thumbnail match the actual video?
- Does your message say what kind of feedback you want?
This checklist is short because the workflow should stay fast. The goal is not to turn every shared recording into a film project. The goal is to remove the rough edges that make viewers stop watching.
Final Take
The best way to share a Mac screen recording online is to finish the video before you send it. Recording matters. Editing matters. The link matters because it removes the last bit of friction between your work and the viewer.
Clipa's Share Link Export makes that final step part of export. Record the screen, polish the timeline, choose Public Link, copy the URL, and send a video that is ready to watch.
Try the Mac-native screen recording and sharing workflow at Clipa.